


How to Draw a Watercolor Mushroom
 Before we dive into how to draw a watercolor mushroom painting, let’s take a second to review the impact mushroom carry musicians on artists. Mushrooms are constantly readily available to affect paints of all natural themes. Mushrooms infuse a feeling of wildness—whether you’re interpreting what you see or simply losing yourself as you take in all of their variety, one thing is for sure,is without a doubt, mushrooms are an essential part of forests. Today we present you with four steps towards creating an amanita mushroom paint! Our wooden desktop provides you with a beautiful backdrop for this full of forest atmosphere masterpiece.
- 12 Colors Woodless Watercolor Colored Drawing Pencils
- 50 / 72 / 90 /100 Colors Solid Watercolor Paint Set Including Metallic Color
- 24 Pcs Professional Nylon Hair Paint Brush Set
- 11 Pcs Premium Miniature Detail Paint Brush Set

Start by sketching your mushroom. We used a woodless pencil from water-based colored pencils, as colors can be mixed and- layered effortlessly. At this stage, you need to concentrate on creating your basic mushroom formation; disregard any details for now. Once you feel confident with your sketch, work section by section to create a complete mushroom structure to color with a small amount of water.
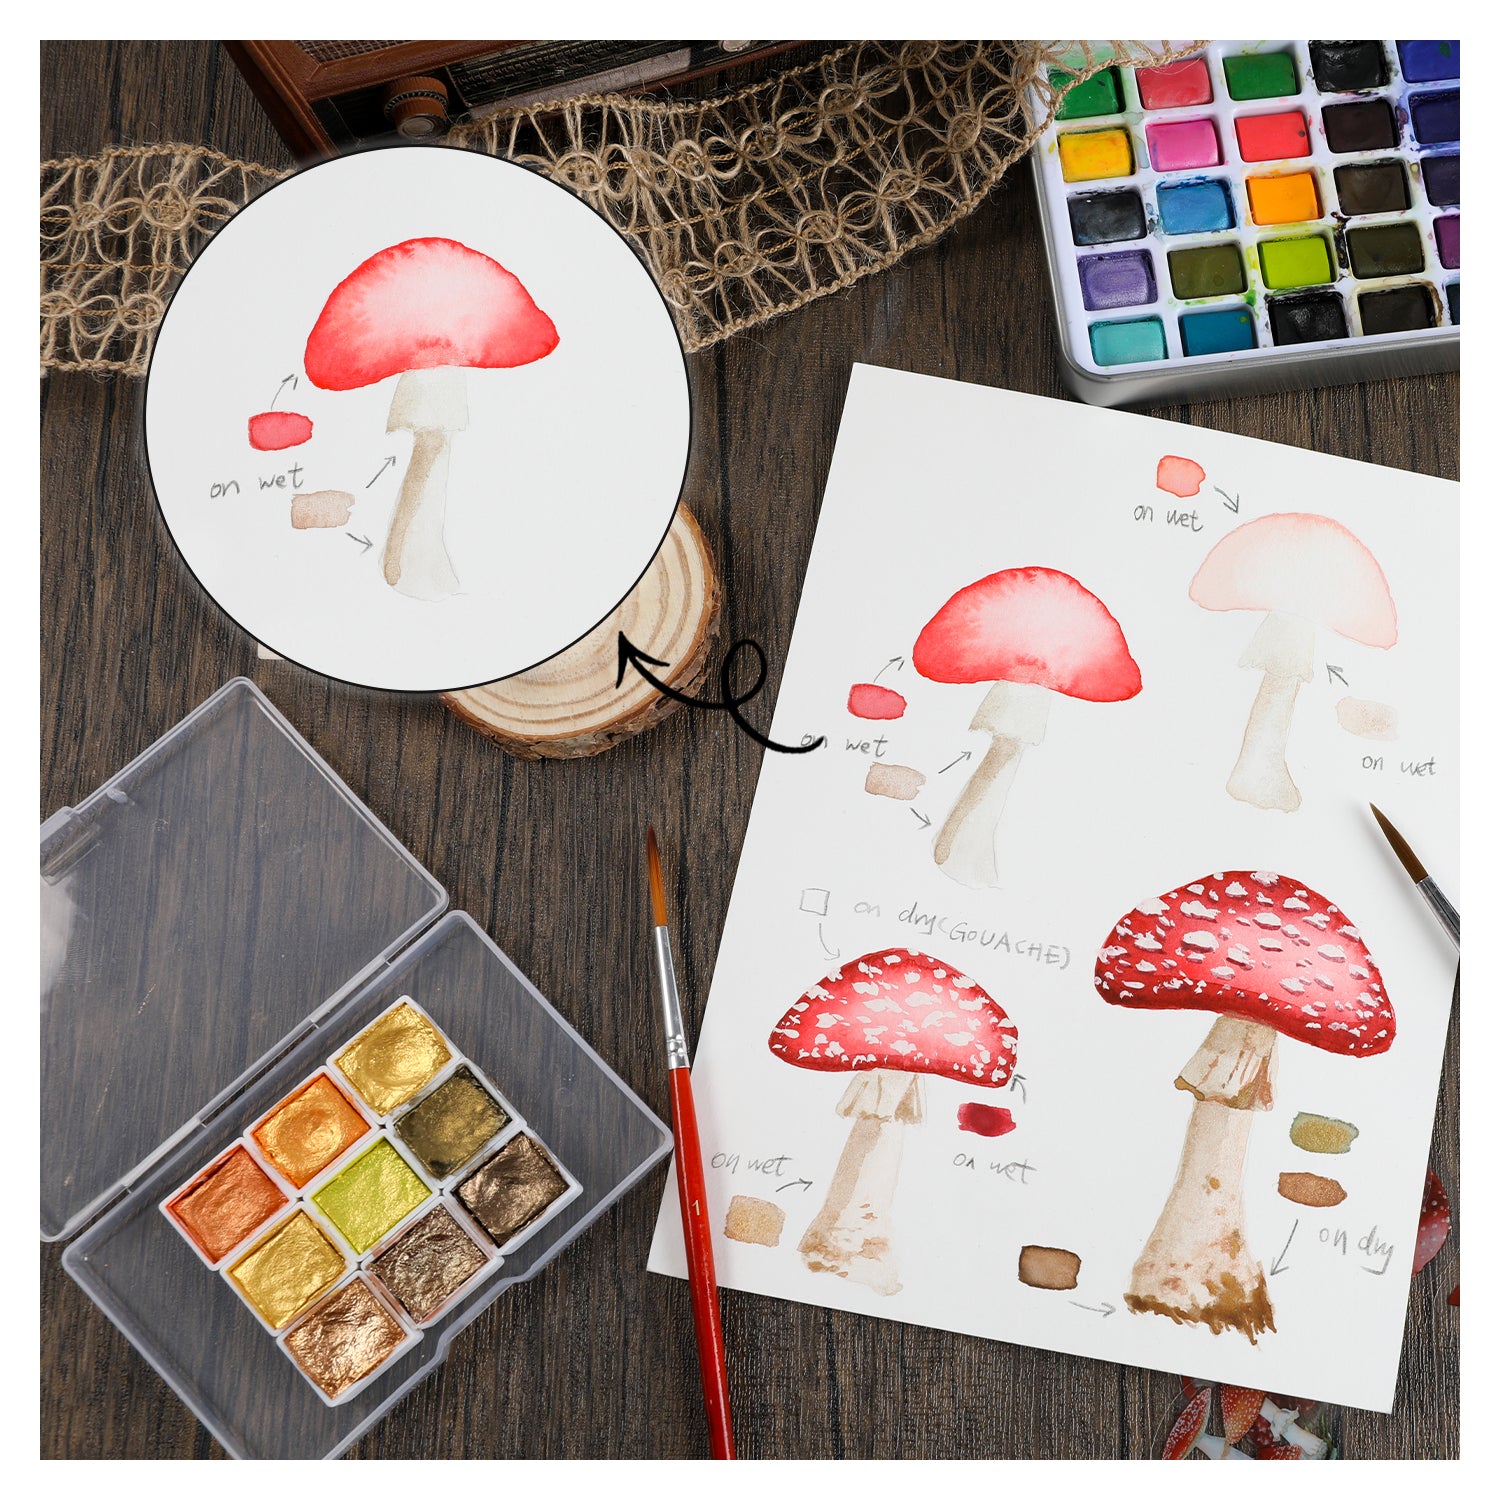
Time to spread colors, our artist used solid watercolor paint set which are specially formulated to offer a high concentration of pigments while remaining easily re-settable and bendable! On your palette pad, start with pale red color, on a smaller round brush. Mix this color with water to produce a more transparent medium. When dealing with watercolor paints, it is best to work your way up, beginning with a diminished color and finishing with paint straight from the palette.

Next, you’ll be tackling the white spores on the red cap and the stipe under the cap of your mushroom. For the white spores, we need to use liner brush size 2 from nylon hair paint brush draw some fine snowflake dots on the top of red cap randomly with white gouache on dry. Then, using a darker beige shade, watered down slightly, apply more brush strokes to the stipe of mushroom and in places behind the light hits and the root of mushroom. The farther your mushroom are from the light source, the darker shades that area should be. Allow time for this layer to dry before moving onto Step 4.

Step 4: Optimize the shades and details
Time to add the finishing touches! We will enhance details and shadows to complement your amanita mushroom. Start by diluting brown and dark green with some water, then use miniature detail brush to flick the paint over the shadows of the stipe. Add as many layers as needed until you feel your painting is complete. Lastly, apply some dry brown pigments, dip on the mushroom rhizome to mimic the mud from soil, making the mushroom looks more wild.
Now that you have the mushroom down, are you ready to draw the leaf, or perhaps more watercolor mushrooms? For more amazing Grabie’s products, shop the suggested set below for your next creation.


