


How to Draw a Realistic Balloon
 Welcome to PAINTING TUTORIAL TIME! Recently, we have had some children’s day theme painting tutorials. How to draw a balloon is the main topic of today's painting tutorial. Art can bring our life a lot of interests and amazing experiences. The existence of the art has added colors to festivals and let's release for a flight the jolly mood in it!
- 12 Pcs Graphite Sketch Pencils Set With Tin Box
- 12 Pcs Super Fine Miniature Detail Paint Brush Set
- 30 Colors Acrylic Paint Set With Metal Color
- 12 Grid Big Size Gouache Paint Palette

You need to draw the balloon and choose your favorite shape for balloon sketch drawing. A star shape like the one in this example is suitable for most festive atmospheres. Start by sketching the outline of a five-pointed star. Then draw some lines of texture and structure of the balloon to help prepare the foundation for the subsequent creation of a three-dimensional balloon. Graphite sketch pencils would be used in this step for sketching.

Step 2: Color the balloon in your favorite color
After that, it is time to use a high-quality paintbrush to color red paint from the top, here we need to paint one layer after another, and then wait for the paint to dry layer by layer, don’t forget to leave a highlight area. Our artists have used horse hair flat paint brush, and this set can meet different needs in models, ensure that you always have just the right paintbrush, and offer the perfect for each phase of all your artistic painting projects.
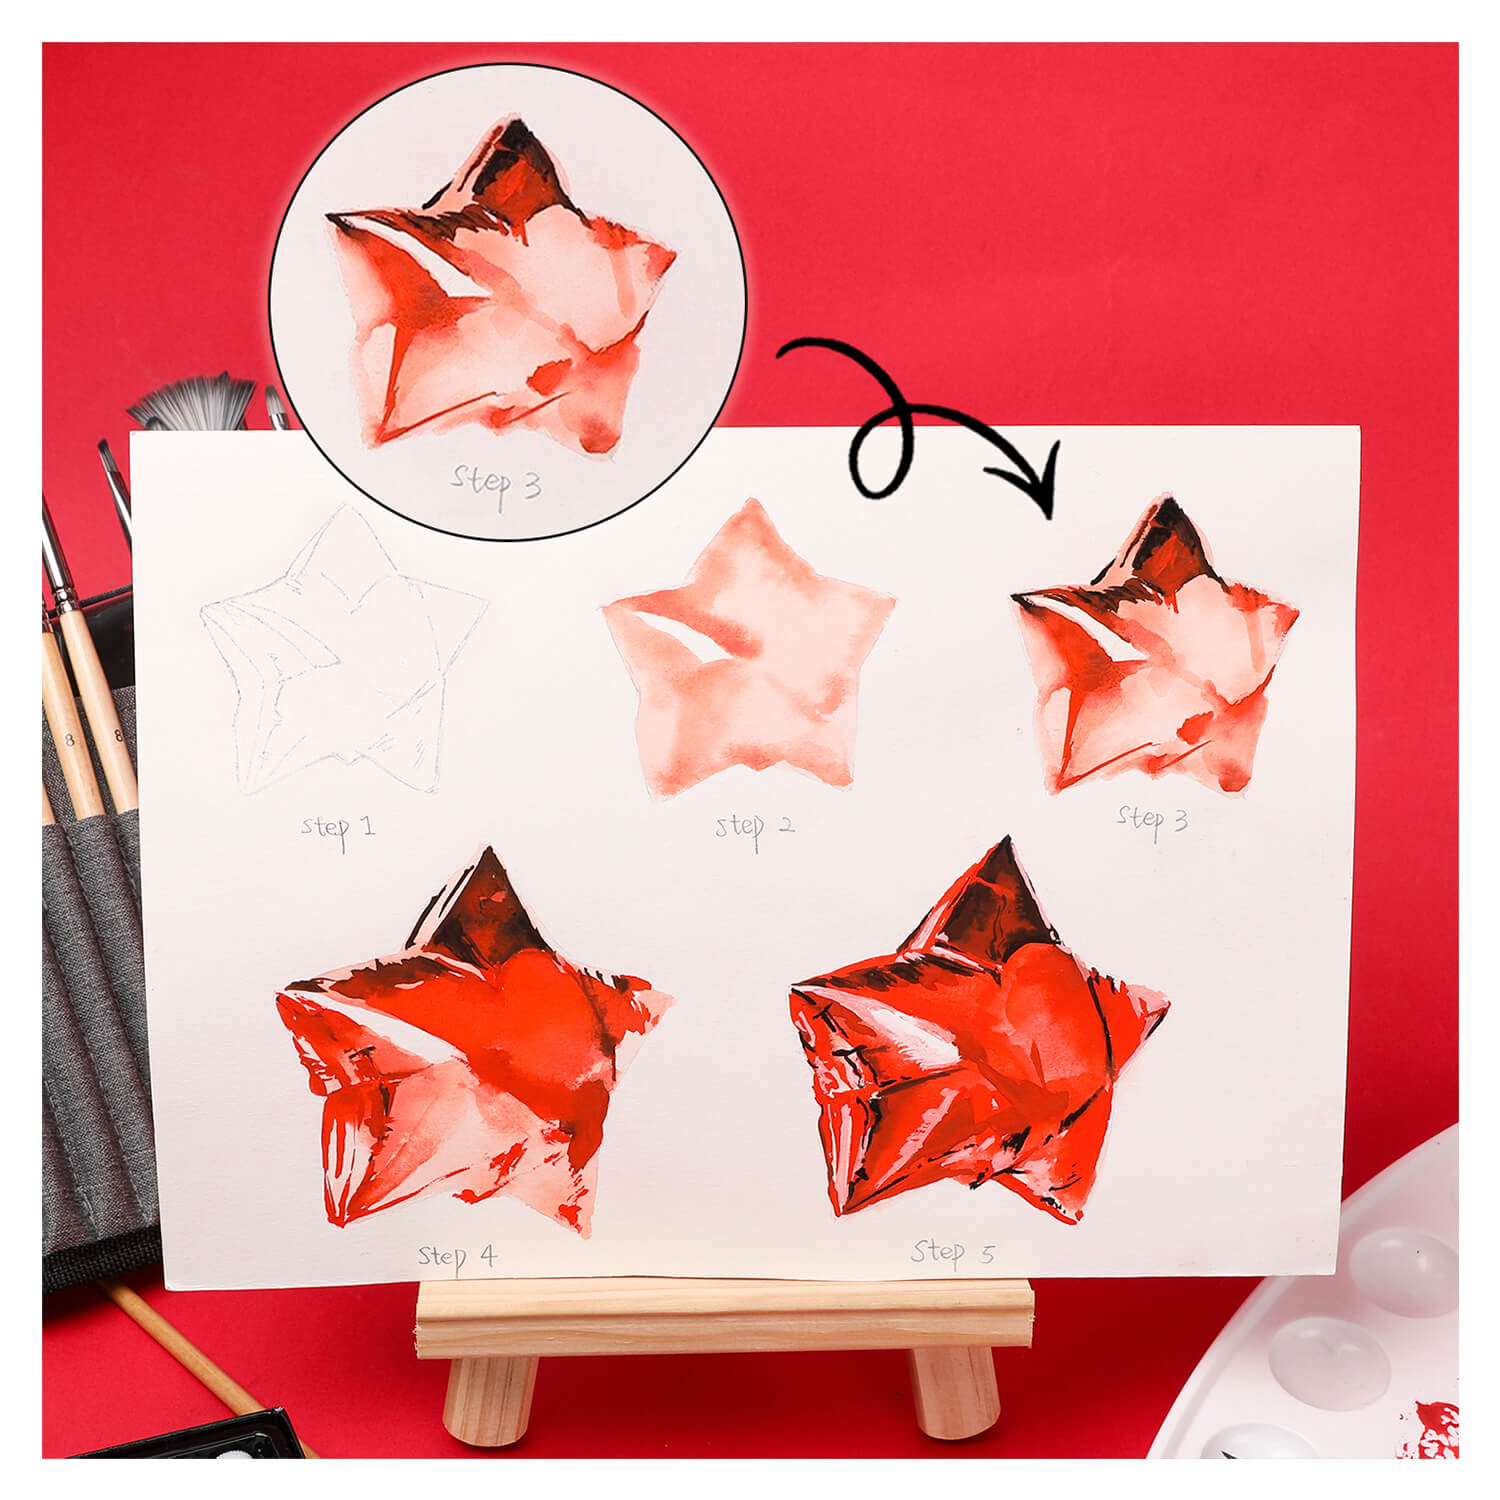
Step 3: Apply dark colors to create shadows and folds for the balloon
Here we will add some darker red and black colors, the two colors may be mixed a little. This will add shadows and folds to the balloon and make it look more real and tridimensional. 24 colors premium acrylic paint tubes are highly recommended for the coloring step. It is easy to blend to create an endless range of colors and thanks to it both beginners and professionals can create a masterpiece with it.

In this step, mix a small amount of water with red paint, and outline the outside of the balloon with miniature detail brush, the purpose is to give this balloon a feeling of swell. Then we can add a "gray side" to the balloon by using red paint mixed with more water, according to our own preferences to make it look more layered and more real.

Step 5: Optimize all details and highlights
In the final step, you need to optimize all the details and highlights, apply red paint dilute with water on the gray side, blend black paint with red to outline the dark side and mix a small amount of water with white paint on the bright side. For a more natural effect, you can smudge some red paint transitions on the inside of the white highlight.
Thank you for joining the acrylic painting tutorial and creating a realistic balloon drawing with us today, we hope you found this article insightful, entertaining, educational, and encouraging. Let us know how your ornaments turned out in the comments section of this article, and tag us on social media! Are you feeling inspired and want to create more paintings? Shop suggested painting set for your creation!


